
Which angles should you shoot for every product?
A repeatable shot list of front, back, side, detail, in-use and packaging shots that works for most small-brand products.
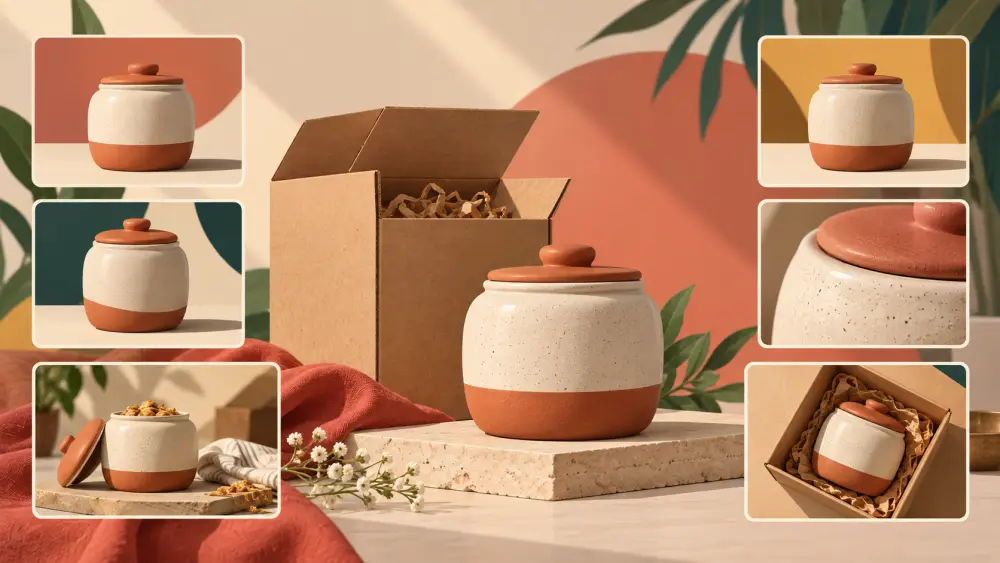
Shooting a new product without a plan means retaking photos later when you realise you missed something. A fixed shot list solves this. You shoot the same set of angles every time, and your whole catalogue ends up consistent without extra thought.
The core shot list
These angles suit most physical products. Not every product needs all of them, so drop whatever does not apply.
- Front. The clearest, straight-on view. This is usually your main image.
- Back. Shows what is on the other side: pockets, a label, a clasp or a plain reverse.
- Side. Shows depth, thickness and shape that a front view flattens.
- Top or three-quarter. An angled view that shows form from above and the side at once.
- Detail. A close-up of texture, stitching, print, finish or a special feature.
- In use. The product worn, held or placed in a real setting.
- Scale. The product beside a hand or a familiar object.
- Packaging. What the buyer actually receives, boxed or wrapped.
Why each angle earns its place
The front image identifies the product. The back and side answer "what is the rest of it like?". The detail shot builds trust in quality. The in-use shot helps a buyer imagine ownership, which is covered in how to shoot in-use lifestyle photos. The scale shot prevents size surprises, see how to show product size in photos. The packaging shot sets expectations about the unboxing.
Keep the distance and height fixed
Pick a standard distance and camera height for each angle, and mark your spot with tape on the table or floor. When you shoot another product the same way, edges and proportions line up, and your listings look tidy when browsed side by side. The same setup advice is in photographing products on a phone.
Adjust by product type
A flat item like a print needs only a straight-on shot and a detail. A wearable needs an on-body shot. A jar or bottle needs a label-forward view and a back label shot. Use the core list as a menu, not a rule. How many photos should each product listing have helps you decide how far to go.
Shoot all angles in one session
Set up light and backdrop once, then shoot every angle of one product before moving on. This keeps light and colour consistent between shots, so the same product does not look like two different colours across angles. If you sell the same item in multiple colours, shoot each colourway with the same angles, as described in product variants, colourways and sizes.
Quick routine
- Clean the product.
- Shoot the front first, check focus at zoom.
- Move through back, side, top, detail.
- Add in-use, scale and packaging last.
- Delete blurry or duplicate shots straight away.
You do not need an ideal number of photos. You need enough angles to answer a buyer's questions, shot the same way every time, so your catalogue looks organised and your next product takes minutes to photograph instead of an hour.