
How to photograph steel and metal utensils without reflections
Steel mirrors its surroundings. A paper tent, soft light and a careful angle give you a clean photo of vessels, tiffins and cutlery.
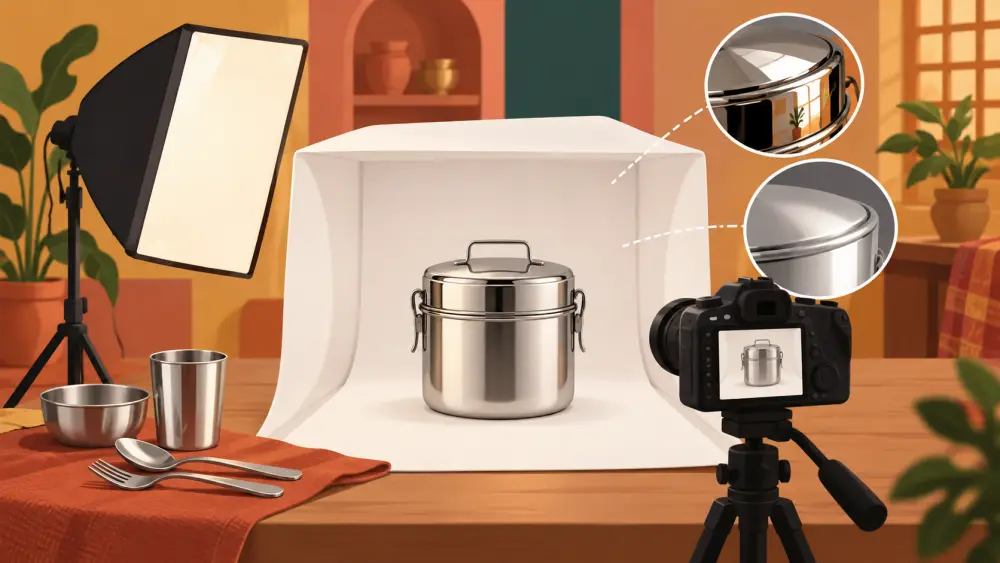
Steel vessels, tiffin boxes, bottles and cutlery are some of the trickiest things to photograph. Every curve picks up the room: the window, the ceiling fan, the wall, and you. You will not get rid of that completely, but you can turn the messy reflections into a smooth, quiet one.
Understand what you are fighting
A polished steel surface shows whatever is around it. A curved surface, such as a pot or a bottle, bends the reflection, so even a plain room becomes a distorted mess. A brushed or matte finish is easier, because it scatters light and shows fewer sharp reflections. Expect to spend more time on a polished piece than a matte one, and do not promise yourself a flawless result.
Build a simple paper tent
A "tent" is a shell of white paper around the product, so that the only thing the steel can reflect is soft white.
- Stand the product on a sheet of white chart paper or a white cloth.
- Curve more white paper up behind it, and bring paper or cloth in from both sides, leaving an opening at the front for the camera.
- Light from outside the tent, through the paper, ideally from a window. The paper diffuses the light so the steel shows a clean white sheen instead of hard hot spots.
- Put the phone at the opening and shoot through the gap, ideally from a small distance, using a little zoom by stepping back rather than pinching.
Cut a small hole or hide the phone behind a black card, if you can, so its reflection stays small. A dark cloth over the phone helps a lot.
Use dark edges for shape
If everything is white, a steel piece can look flat and its outline disappears. A thin strip of black paper or cloth placed just outside the frame, on one side, gives the steel a dark edge that defines its shape. This is why professional shots of steel often have a slim dark line along the sides. Try with and without, and keep whichever looks better.
Choose your angle carefully
- Slightly above and a bit off-centre often works best for open vessels, since you can show the inside without a direct mirror reflection.
- Straight on can show your own phone in the front of a polished vessel, so move a little to one side.
- Lids and handles: shoot a close-up separately, because small details are much easier when the camera is not trying to capture the whole vessel too.
Shoot several angles, as in which angles to shoot for every product. Customers also want to know the size, so include a shot that shows scale, using the ideas in photographing products for scale.
Clean thoroughly before you shoot
Water spots, fingerprints and fine scratches show up under soft light. Wipe the utensil with a soft dry cloth just before shooting, and handle it by the base or the inside. Gloves or a cloth keep the prints away. The details are in avoiding fingerprints and dust.
Be honest about the finish
Photos can make steel look brighter or duller than it is. In the description, say clearly whether the finish is polished, brushed or matte, and mention the measurements and capacity if they apply. The post on describing material honestly is a good guide, and general reflection tips are in photographing shiny and reflective products.
Check, then redo
View each photo at full size. Look for a face or window frame reflected in the surface, for bright blown-out patches, and for dust. If you see them, nudge the paper, change the angle, or reposition the light, and shoot again. A few patient rounds usually give a usable image, even if it is not a studio standard.