
A cheap tripod or stand setup for consistent product shots
A basic tripod plus a few pieces of tape on the floor lets you shoot every product from the same spot, at the same height.
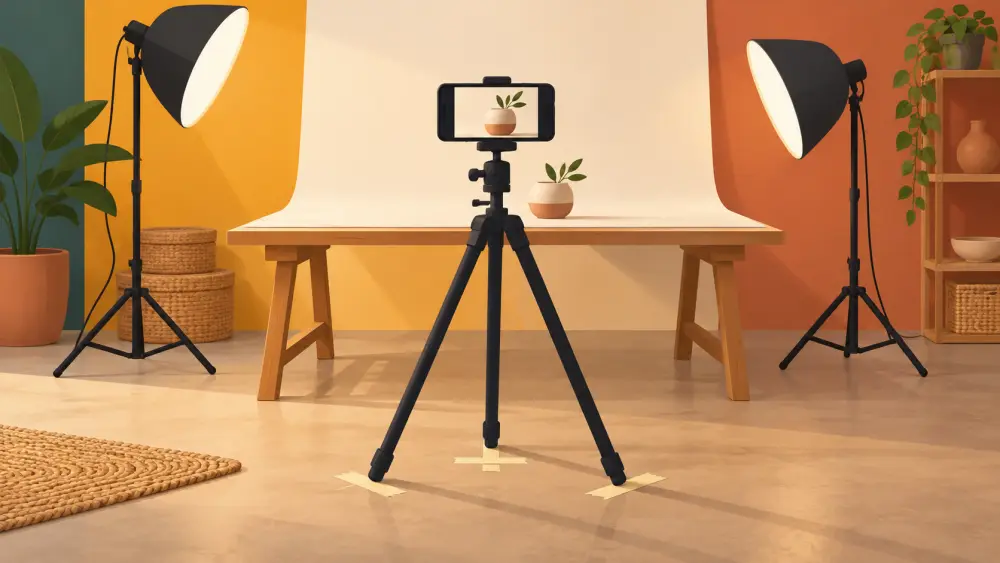
If you shoot more than a handful of products, the real problem is not sharpness, it is sameness. Photos taken from slightly different distances and heights make a catalogue look messy. A simple, inexpensive tripod or stand, plus a few marks on the floor, solves that.
What you actually need from a tripod
You do not need anything fancy. Look for these basics in whatever basic tripod or phone stand you can find:
- Stability. It should not tip or sag when the phone is attached. Test by gently tapping the table it stands on.
- A phone clamp that grips firmly. Wobble in the clamp ruins the benefit of the whole stand.
- Adjustable height. You want to match the camera to the product's height rather than always shooting from above.
- A head that locks. If the angle slowly droops, you will get a different tilt in each photo.
Try it at the shop with your own phone attached before you buy, if that is possible. If you do not want to spend, a stack of books and a timer, as covered in keeping photos sharp without a tripod, works for a start.
Build a fixed shooting spot
The point of a stand is repetition, so create a spot that never changes:
- Choose a table near a window, because window light is free and soft.
- Put your backdrop in place. A DIY white background works well.
- Place the tripod at a distance where the typical product fills most of the frame.
- Mark the tripod's three feet with masking tape or a pencil line on the floor or table, so you can put it back exactly.
- Mark where the product sits too, with a small tape corner or a drawn outline on the paper.
When you pack up, you will not lose the setup. When you return, the camera is where it used to be.
Keep the height and angle the same
Note the height of the tripod and the tilt of the phone. Many tripods have numbered or marked leg sections, and you can write the setting on a piece of tape on the stand. For each product type (small items, tall bottles, flat items) you may want one or two different settings. Write each one down in a notebook or a phone note so you can restore it later.
Use the timer or a remote shutter if your phone supports one, so tapping the shutter does not shift the camera. Camera behaviour varies between phones, so check what your phone offers.
Let the product, not the camera, move
With the camera locked, the only thing you change between shots is the product. Slide it into the marked position, tap to focus on it, shoot, and swap in the next one. This is fast, and it gives you photos with the same scale and the same perspective. If a product is much larger or smaller than usual, you can adjust, but go back to the marks for the next ordinary item.
Watch for a few common problems
Shadows from the tripod falling across the product can be a surprise, so look at the table before you shoot. Reflections of the stand in shiny products are another. Also check that the light stays steady. If clouds change the window light, your photos will drift in brightness even though the camera does not move. A reflector helps even things out, and using a white chart paper reflector costs almost nothing.
Why it matters for your store
Buyers scroll quickly. When every thumbnail has the same angle, framing and background, your store looks organised. That impression of care is easy to build with a stand and some tape, and the longer-term habits are discussed in keeping a consistent look across your catalogue.