
How to photograph leather goods for your online store
Leather sells on touch and smell, and a photo has neither. Here is the shot list that lets grain, stitching and hardware do the convincing instead.
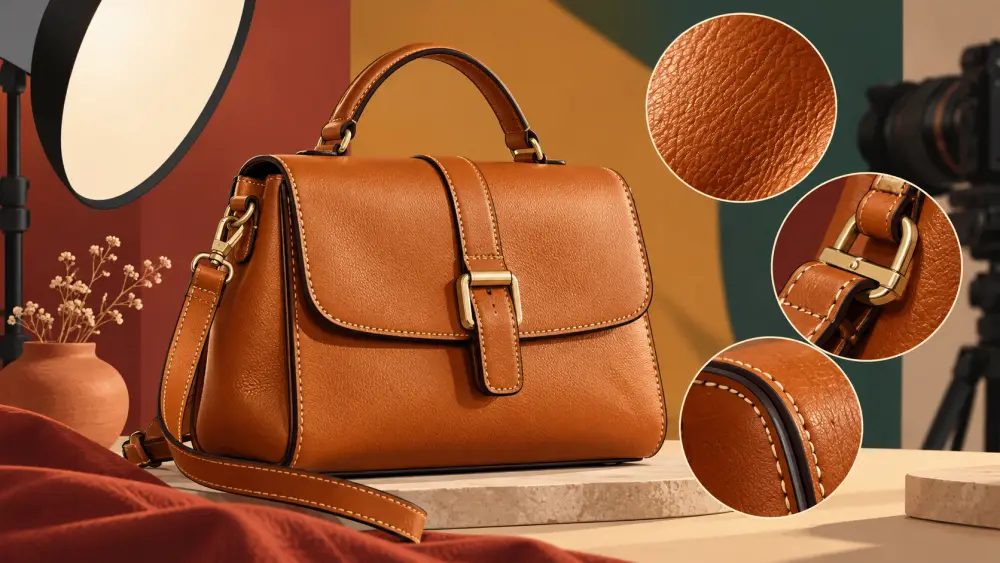
A buyer cannot feel your leather wallet or smell it. All they have is the screen, so the photos must carry the job of proving the leather is good. Plan a small, repeatable set of shots and you will cover most of what a careful buyer wants to check.
Start with the full product on a calm background
Shoot the whole item first, flat or standing, with space around it. Leather is dark and glossy in many finishes, so a mid-tone or light neutral background separates it better than black. Keep the item straight to the lens so the shape reads honestly. If a wallet is slim or a belt is long, show that outline clearly before you move in close.
Grain is the hero close-up
Move in until the grain fills most of the frame. Light from a window, coming from the side, makes the texture visible. Flat light from straight on hides it. Hold the phone steady, tap to focus on the surface, and take two versions, one slightly brighter and one slightly darker. Leather often needs a darker exposure than your phone chooses, because the phone tries to brighten dark browns into grey. For lighting basics see how to use window light for product photography.
Be honest about what grain shows. Natural leather has small marks, uneven pores and tone changes. If you hide them, the customer finds them on arrival and complains. If you show one clear close-up, you set the expectation that these marks are part of the material.
Stitching and edges
Stitching tells a buyer how the product was made. Shoot one straight line of stitching along a seam, and one corner where stitches change direction. Show the edge finish too, whether painted, burnished or raw. A tidy edge is a quiet sign of care, and a close-up costs you nothing.
Hardware shots
Zips, buckles, snaps and rivets are the parts that fail first, so buyers inspect them. Take a close-up of each type of hardware in your product. Watch for reflections. Metal on a shiny surface picks up your window, your hand and your phone. Our post on photographing shiny and reflective products covers how to angle the item and soften the light so the metal looks clean.
Show inside and scale
Open the item. A wallet should show its card slots, a bag its lining and pockets. Then add one photo with a hand or a familiar object so size is obvious. Pair this with clear measurements in the description, as in how to photograph bags and wallets.
Keep colour true
Brown, tan and burgundy shift quickly under warm bulbs. Shoot near daylight, avoid mixing it with room lights, and compare the photo to the real item on your phone screen before uploading. Mention the colour name in words as well.
A simple shot list to copy
- Front, full item, clean background
- Back or reverse side
- Grain close-up, side-lit
- Stitching along a seam
- Edge finish
- Each type of hardware
- Inside, opened up
- One scale shot with a hand
- Any natural mark you want to be upfront about
Nine photos is plenty. If your store allows variants, add one front photo for each colour so buyers do not guess. Finally, run through the product photography checklist before you publish, and reshoot anything blurry or tinted. Leather rewards patience, and a calm, honest set of images will do more work for you than any adjective in the title.