
How to photograph DIY craft kits for your online store
A craft kit sells when buyers can see exactly what is inside and what they will make. Lay the contents out in order and show the finished result beside it.
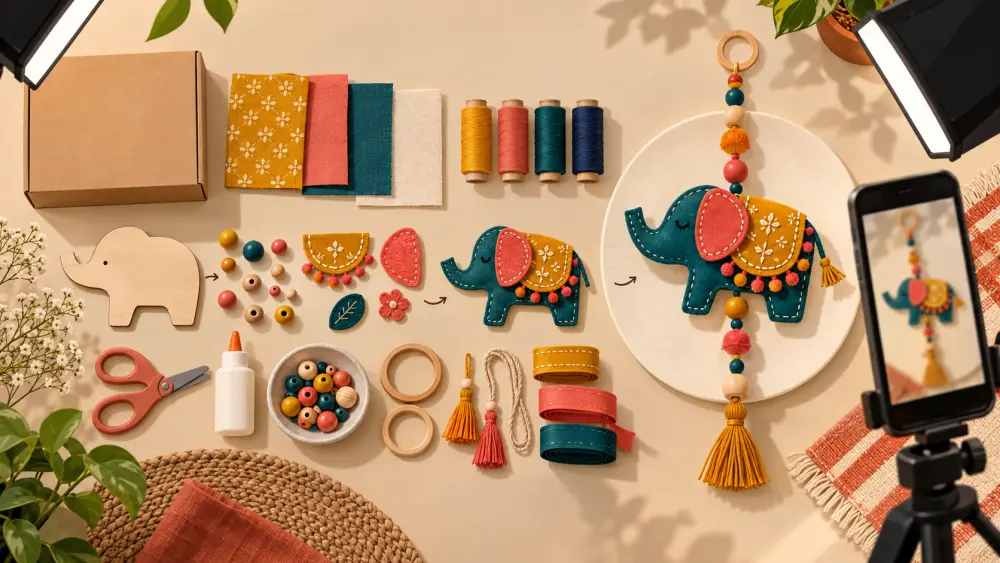
A buyer looking at a DIY kit asks two questions. What do I get, and what will I end up with? Your photos should answer both without making them read. If a customer has to guess whether the brushes, the board or the glue are included, they will either skip the product or message you, and a few will complain after buying.
Shoot the flat lay of contents first
Take everything out of the box and arrange it on a plain background in the order it is used. Space items so none overlap, and keep a clean grid or a gentle line. Shoot from directly above with the phone parallel to the surface, as described in how to do a flat lay. Count every piece in the photo, and make sure the count matches your description.
Add a numbered or labelled version
If your kit has many parts, a second flat lay with small labels or numbers helps. You can add the labels in a free editing app, or place small paper tags beside each item. This also works as an insert you can include in the box. It reduces "something is missing" messages, because customers can check against it.
Show the finished piece
Make the kit yourself, and photograph the result in good light. This should be your genuine result using only the supplied materials, not a version made with extra items you did not include. If you used an additional tool or paint, say so in the description. Buyers feel cheated when the finished example needs things that are not in the kit.
Show the process in two or three frames
You do not need a full tutorial. Add a few photos or a short video showing the key steps, such as a half-finished stage and the detail of the technique. A short clip of someone working through a step can reassure beginners. For ideas on filming, see recording a short product video with a phone.
Show size and scale
State the finished size in words, and show it in a picture with a hand or a familiar object. People often imagine a craft piece being larger than it is.
Photograph the box and the instructions
Show the packaging, the front and back, and any printed instruction booklet. A photo of the instruction card with the text readable tells buyers that the kit is guided, and helps them judge difficulty. Include the age guidance or skill level you recommend, and keep it honest.
Use consistent light and background
Natural window light and a plain surface keep the focus on the materials. Pick a background that contrasts with the colours in the kit, as discussed in what background colour works best. Avoid heavy filters, since colours matter in craft, and the thread, paint or paper you show should match what arrives.
Shot list
- Box front and back
- Flat lay of all contents
- Labelled version of the flat lay
- Finished piece, made from the kit
- Two or three process frames
- Instruction card, readable
- Scale shot with a hand
Go through the product photography checklist before you publish. A kit that shows its contents openly and its result truthfully turns browsing into confident ordering, and cuts down on the "I thought it came with" messages that plague this category.