
How to measure a garment correctly for your size chart
A point-by-point guide to measuring chest, length, shoulder and waist on a flat garment, so every number in your size chart is repeatable.
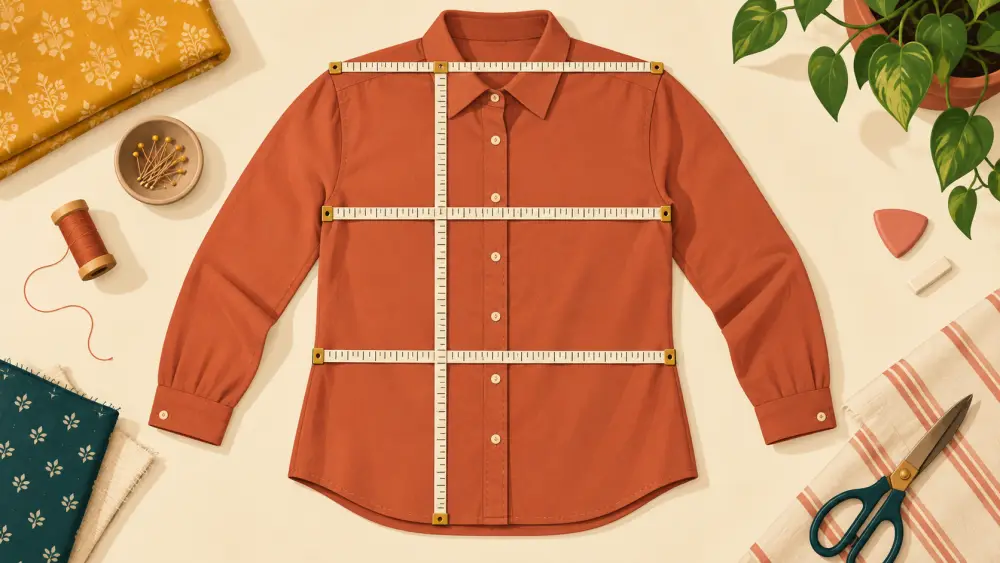
A size chart is only as good as the measurements behind it. If you measure the chest of one kurta across the armpits and the chest of the next one lower down, your chart will quietly lie. The cure is a fixed routine: the same points, the same way, every time. This guide walks through the most common measuring points on a garment laid flat. These are practical habits, not a universal standard, so adjust them to your own products and stay consistent.
Prepare the garment
Lay the garment on a clean, flat surface such as a table or bed. Iron it first if it is creased, because folds shorten the numbers. Fasten buttons and zips and smooth the fabric without pulling or stretching it. Use a soft tape measure, not a stiff metal ruler, so you can follow the edges neatly.
Decide on flat or doubled
When a garment is flat, you measure its width from one side to the other. The full circumference is double that width. Pick one method and apply it to every garment. If you show flat width, label it "flat". If you show the doubled figure, label it as a full measurement. Many sellers get this wrong by mixing the two across sizes.
Chest or bust
Measure straight across the garment about an inch or two below the armpit seam, from one side edge to the other. Keep the tape level, not slanted. Note the number, and double it if you list the full measurement. This is usually the most important number on a top.
Shoulder
Measure from the outer edge of one shoulder seam to the outer edge of the other, straight across the back or front. If the garment has a dropped shoulder or a kimono sleeve, the shoulder seam sits lower or is absent. In that case, either skip this measurement or note that the shoulder is dropped. Be honest about the style.
Length
For a top or kurta, measure from the highest point of the shoulder, next to the neck, straight down to the hem. For a dress or gown, do the same. Let the tape follow the garment's centre. For trousers, measure from the top of the waistband to the hem, and mention the inseam separately if it matters. Always say where you started and where you ended, in a note on the chart.
Sleeve length
Measure from the shoulder seam, along the top edge of the sleeve, down to the cuff. For sleeveless garments, skip this. For three-quarter sleeves, state the sleeve length rather than writing "three-quarter" and assuming everyone knows what that means.
Waist
For trousers, skirts and fitted tops, lay the waistband flat and measure straight across its edge. If the waistband is elastic, measure it relaxed and, if you wish, mention that it stretches without stating an exact figure unless you have tested it. For a fitted dress, measure the narrowest part across the body.
Hip
Measure straight across the widest part of a skirt, trouser or dress below the waist. Keep the tape level and note the position, such as a set distance below the waistband. Use the same distance for each size.
Round and record
Round each number to a sensible unit, such as the nearest half centimetre or half inch. Write every figure down at once, with the size and the garment name. Measure twice, and if the two readings differ, take a third and go with the consistent pair.
Link it to your chart
Once measured, put the numbers into a grid and decide how to present them. Our guide to making a size chart for your clothing store takes you through that. And if the chart is going to appear as an image, see how to design a clear size chart image for mobile screens.